Showing posts with label crafting. Show all posts
Tuesday, March 26, 2019
{ I'm back on it....the homemaker groove that is }
Remember when I told you that after we moved from Idaho, I seemed to have kind of lost myself and even though I love being a homemaker, I wasn't exactly acting like one.
I did the bare minimum to get by, but the love for the homemaking craft itself seemed to have dwindled.
I would be lying if I told you that I didn't struggle to find it again, matter of fact, and to be quite frank with you all, it took almost 3 years. But, I found it, I found the homemaking groove again and I'm so incredibly content at the moment.
Everything about my life is love. It is filled with family and moments of laughter. That's not to say that there aren't tough moments, health issues, or times when things aren't exactly going to plan, but overall, I feel such immense contentment with my life and where I am in this journey.
That love overflows from inside the home to the outside as well. When I was in Arizona I had grown so many veggies, had tons of plants that were thriving and growing beautifully. I haven't been able to do that in a long time, firstly because we were moving and had just left the military and everything was up in the air.
Then we moved from Idaho and again it was all just so chaotic, I wasn't really feeling myself, feeling a good homemaker and so things fell to the wayside.
As I get back into the groove, one thing I'm itching to do, is get back into gardening and growing. I have all these plans and thoughts and ideas about what I want to do in our yards this summer, and hubby is on board so I'm super excited about that.
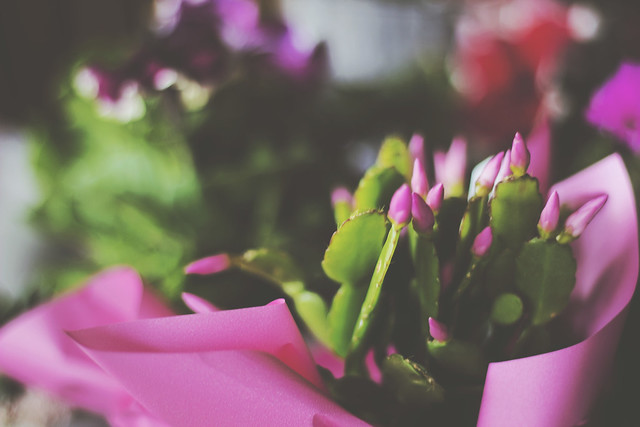
On Sunday when we dropped Jasmine off at work, we stopped at Walmart for some meds, and then Curt and I had a little mooch around. I went straight to the garden center, not because I had something specific in mind that I wanted, but I love looking around during this time of year.
The garden area is filled with colorful flowers, huge potted plants, trees and shrubs, vases and patio furniture, and everything you could possibly want or need to set up a beautiful outside area.
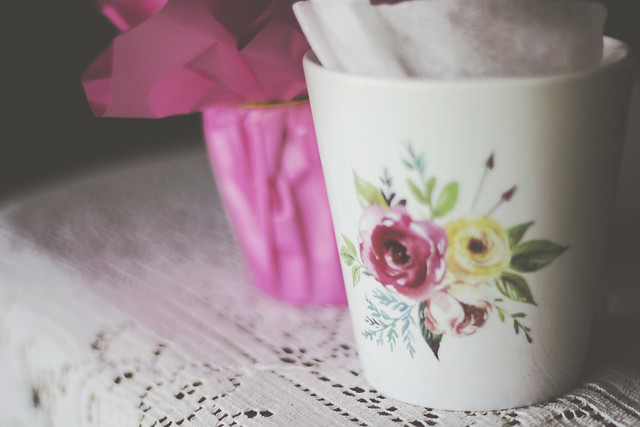
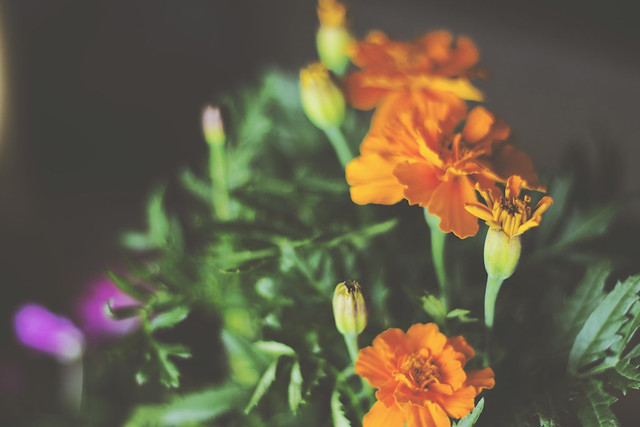
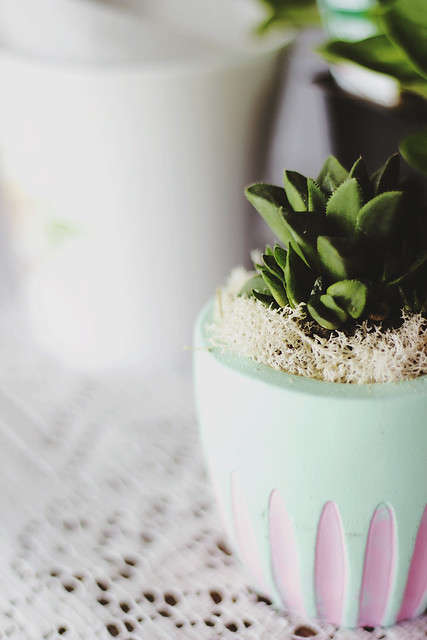
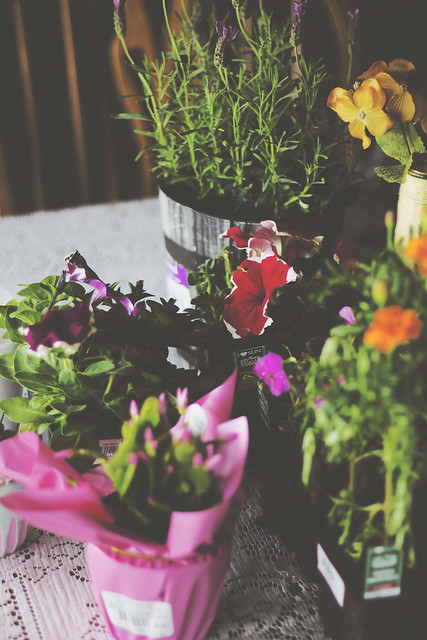
We walked around a bit and settled on some plants to bring home, they were the cheap $1.98 ones and I just couldn't resist. I knew I had to bring them home.
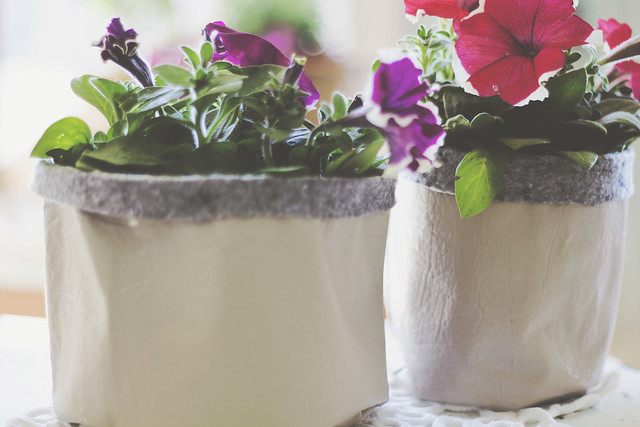
Yesterday morning I got them all repotted and situated and then pulled out some faux leather fabric I had and started a project I had wanted to make for a while.
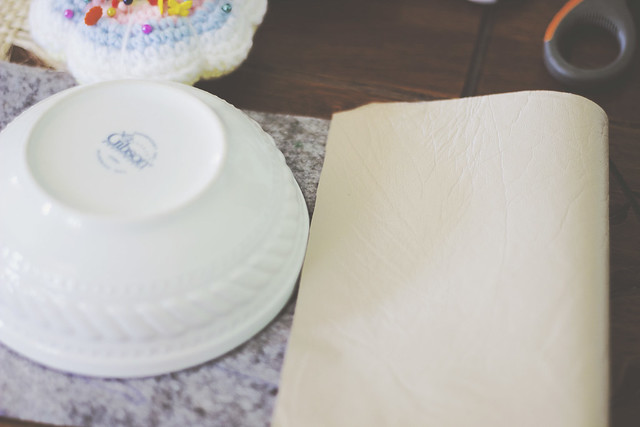
Fabric planters. The possibilities are endless and the fact that you can make your own means that you can use fabrics that will complement your home.
I had some faux leather fabric that I had bought back in Arizona and had been keeping for just the right project, whatever that might be. I knew that I wanted to use it for these plants.
I wasn't quite sure how to make them, or how I would do it and so these first two that I made were pretty much me winging in and using the easiest method possible. I measured the height, the width and the circumference of the pot, added about half and inch more, and then grabbed my hot glue gun and went to work.
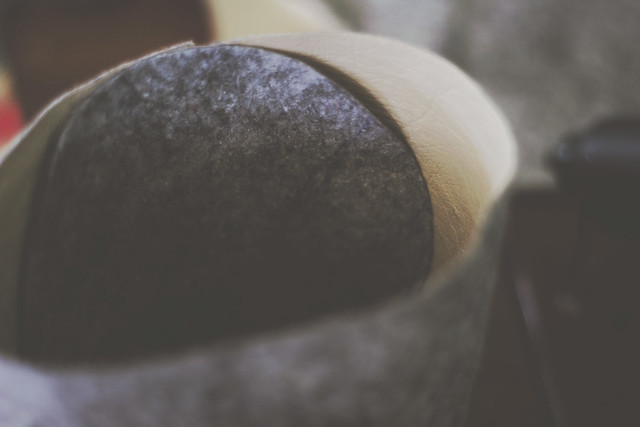
These are not perfect, not by far, but I love how they turned out and as I make more, I now know what works what doesn't, and how to make them neater. I still am very pleased with the result and think the flowers look gorgeous in the fabric planter.
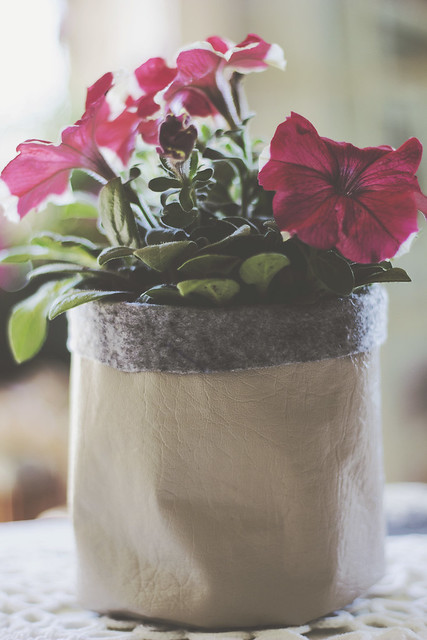
If you're wondering, the fabric planters are not filled with dirt. I merely placed the flower pot into the fabric planter. When it's time to water, I take it out and wait until it is done draining, before placing back in it's fabric planter.
I've been busy fluttering around the house. The minute Spring comes about, I am no longer wanting to stay in bed or under covers, in a corner of the house. I want to be up as soon as the sun is rising, opening windows, homemaking, cooking and baking and crafting.
I've made delicious food for my family's meals, I've crocheted spring and summery placemats, I take immense pleasure in washing clothes and hanging them to dry, planting and creating and so on.
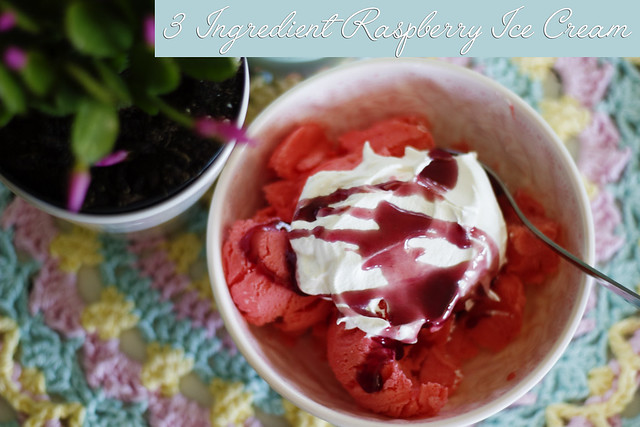
As the weather warms up, my mind goes to homemade treats, especially those that we know the family will be gravitating towards, like ice cream.
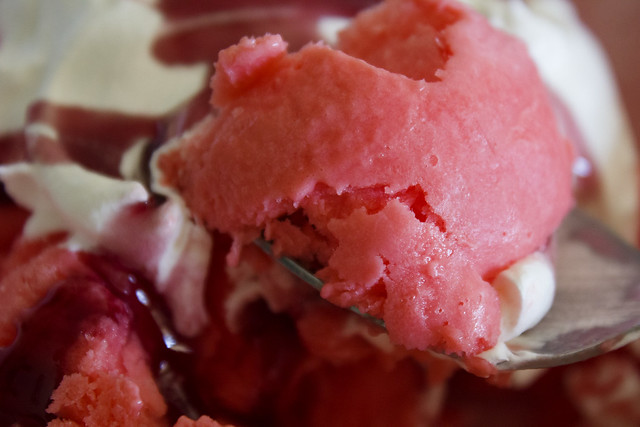
Soooooo, yesterday, well, last night actually, after dinner, I quickly threw together some homemade raspberry ice cream. You won't believe how easy it is to make and it only takes 3 ingredients. Yes, that's right, 3 ingredients.
I'll share the recipe tomorrow, but let me tell you it's delicious, the hubby and kids love it and I'll be making more this summer, using all sorts of flavors.
I have been sharing a bit more on Instagram, it's just easier sometimes to do stories and show you my day in the moment, so if you're interested you can hop on over there and see what I'm up to.
But yes, I'm back in my homemaker groove and I'm hoping to continue sharing my days with you all, tips and tricks, recipes, snapshots of what I'm doing and my home and all sorts of things.
I'm so glad that you've all stuck around and have walked with me through this craziness I call life. I know I haven't been the greatest at commenting back and I apologize for that, I want to try and be better at that so please bear with me.
Anyway, I hope you've enjoyed a sneak peek at my newest plants, crafts and yummy goodies.
I'll be back tomorrow with more :)
Saturday, November 05, 2011
{ A little organizing and such }
Had a busy Saturday, some errands to run, a quick bite to eat, a quick stop at Walmart and then back home.
And after relaxing for a few minutes, I was suddenly bit by the organizing bug and it was directed at my refrigerator.
I have said so many times that I have a small fridge and can't fit anything in there and yadda yadda yadda, but today I was proven wrong and boy was that a lesson. My only thought right now is "why on earth didn't I think of this earlier?".
The answer is simple, I didn't discover the joys of Pinterest until very recently. Oh this place has totally fueled my creativity, has gotten the brain juices flowing and has provided me with idea after idea after idea for my home.
I wish I could take credit for this because it's so easy to do and so simple, yet it makes such a difference.
Anyway, let me show you what I'm talking about.
Here's my fridge before:
It looks cluttered and full doesn't it? I'm not ashamed at all to show you this picture, it clearly needed some help and some cleaning.
So I got to work, first thing I did was remove everything shelf by shelf, ditch what I no longer want which is usually shoved to the back while it grows and develops into something that can attack you when you reach for it. Thankfully, I don't have much of that going on anymore, over the years I've learned to be good about keeping the fridge clear of weird looking stuff. LOL
Next thing, I gave it a really good wipe down and then I pulled out my $1 see through Walmart containers, which reminds me, I am getting more next time I am at the store.
And here is the after:
It looks SO much better. I even put a little tray in the drawer, in there I have the kid's snacks
Veggies
My breads
My dairy, sour creams, cream cheese, yogurt etc
Other cooking stuff
My baking container...a girl can't ever have enough butter right?
This is hubby's container, these are all the jarred meals for his week lunches, fruits and desserts on the right....salads etc on the left.
No more crowded, messy refrigerator and I'm shocked at how much room I have in there, plus it's so much easier to find what I need.
Another plus, if something starts leaking, guess where it will leak into? That's right, all I will have to do is rinse out the container, no more nasty sticky, wet spots on the shelves.
So, there you have it, super easy project for a weekend and the results will make you smile. It got a huge thumbs up from the family.
I guess organizing the fridge got me in the mood for making things....I've been meaning to make another one of those mason jar potpourri lights, so I quickly got one done for the kitchen. I have more lights just need to pick up more potpourri so I can make two more, I want them for the bathrooms, I love having them in there lit at night, it helps the kids when they have to go the bathroom in the middle of the night....it's also great if you have guests staying over :)
I think these would make really cute Christmas gifts, don't you?
Well, that's a little of what I got done today to beautify my home. I'm always working on little things here and there, I feel like it's my contribution to the home :)
But now, I'm going to go climb into bed with my new Mollie Makes which just came in the mail this afternoon, I literally skipped all the way from the post box to the house.
By the way, my house is permeating with the scent of cinnamon, pumpkin pie and other fallish stuff.
Nicholas says it's starting to smell like Christmas, I have to agree ♥ ♥ ♥
And after relaxing for a few minutes, I was suddenly bit by the organizing bug and it was directed at my refrigerator.
I have said so many times that I have a small fridge and can't fit anything in there and yadda yadda yadda, but today I was proven wrong and boy was that a lesson. My only thought right now is "why on earth didn't I think of this earlier?".
The answer is simple, I didn't discover the joys of Pinterest until very recently. Oh this place has totally fueled my creativity, has gotten the brain juices flowing and has provided me with idea after idea after idea for my home.
I wish I could take credit for this because it's so easy to do and so simple, yet it makes such a difference.
Anyway, let me show you what I'm talking about.
Here's my fridge before:
It looks cluttered and full doesn't it? I'm not ashamed at all to show you this picture, it clearly needed some help and some cleaning.
So I got to work, first thing I did was remove everything shelf by shelf, ditch what I no longer want which is usually shoved to the back while it grows and develops into something that can attack you when you reach for it. Thankfully, I don't have much of that going on anymore, over the years I've learned to be good about keeping the fridge clear of weird looking stuff. LOL
Next thing, I gave it a really good wipe down and then I pulled out my $1 see through Walmart containers, which reminds me, I am getting more next time I am at the store.
And here is the after:
It looks SO much better. I even put a little tray in the drawer, in there I have the kid's snacks
Veggies
My breads
My dairy, sour creams, cream cheese, yogurt etc
Other cooking stuff
My baking container...a girl can't ever have enough butter right?
This is hubby's container, these are all the jarred meals for his week lunches, fruits and desserts on the right....salads etc on the left.
No more crowded, messy refrigerator and I'm shocked at how much room I have in there, plus it's so much easier to find what I need.
Another plus, if something starts leaking, guess where it will leak into? That's right, all I will have to do is rinse out the container, no more nasty sticky, wet spots on the shelves.
So, there you have it, super easy project for a weekend and the results will make you smile. It got a huge thumbs up from the family.
I guess organizing the fridge got me in the mood for making things....I've been meaning to make another one of those mason jar potpourri lights, so I quickly got one done for the kitchen. I have more lights just need to pick up more potpourri so I can make two more, I want them for the bathrooms, I love having them in there lit at night, it helps the kids when they have to go the bathroom in the middle of the night....it's also great if you have guests staying over :)
I think these would make really cute Christmas gifts, don't you?
Well, that's a little of what I got done today to beautify my home. I'm always working on little things here and there, I feel like it's my contribution to the home :)
But now, I'm going to go climb into bed with my new Mollie Makes which just came in the mail this afternoon, I literally skipped all the way from the post box to the house.
By the way, my house is permeating with the scent of cinnamon, pumpkin pie and other fallish stuff.
Nicholas says it's starting to smell like Christmas, I have to agree ♥ ♥ ♥
Thursday, July 07, 2011
Bird Seed Wreath
I love making things for the home, I find that the handmade goodies are so much cuter and have so much more meaning than if you go out and buy something.
Obviously some things need to be bought but if you can make it yourself, do so, the feeling at the end as you sit back and watch, is nothing like you can imagine.
I have tons of birds that come to my feeders, from House Finches to Morning Doves to Humingbirds to Crows and a myriad of others, so I wanted to do something different, not just the usual pouring of the seed into the feeder and walking away.
A Bird Seed Wreath.....wait until you see how easy it is to make and the possibilities are endless, I already have another one drying using a different shape than the bundt cake pan I used.
3/4 cup flour
1/2 cup warm water
3 tablespoons light corn syrup
1 envelope unflavored gelatin
4 cups bird seed
bundt pan
nonstick spray
In a large bowl, stir the gelatin into warm water until dissolved. Whisk in the corn syrup and flour.
Stir well to make a paste.
Pour the 4 cups of seeds into the paste,
start mixing, it will get really sticky but just keep mixing to make sure that everything is combined well, you don't want the wreath falling apart later.
Spray the bundt pan with nonstick cooking spray. Start spooning (*snort*) the mixture into the pan, as you spoon it in, press firmly to the bottom.
Keep adding the rest in layers making sure to press firmly and even it out as you do. Set it aside and leave it overnight so it will harden,
you will notice in the morning it has become really hard and looking kinda white.
Just turn the pan upside down and the wreath will slide right out....careful not to break it though.
All that's left is to tie a ribbon to it, or if you don't have a ribbon
Once the wreath is hard, gently remove it from the mold. Tie with ribbons, and hang it for birds to enjoy!!
Obviously some things need to be bought but if you can make it yourself, do so, the feeling at the end as you sit back and watch, is nothing like you can imagine.
I have tons of birds that come to my feeders, from House Finches to Morning Doves to Humingbirds to Crows and a myriad of others, so I wanted to do something different, not just the usual pouring of the seed into the feeder and walking away.
A Bird Seed Wreath.....wait until you see how easy it is to make and the possibilities are endless, I already have another one drying using a different shape than the bundt cake pan I used.
Bird Seed Wreath
3/4 cup flour
1/2 cup warm water
3 tablespoons light corn syrup
1 envelope unflavored gelatin
4 cups bird seed
bundt pan
nonstick spray
In a large bowl, stir the gelatin into warm water until dissolved. Whisk in the corn syrup and flour.
Stir well to make a paste.
Pour the 4 cups of seeds into the paste,
start mixing, it will get really sticky but just keep mixing to make sure that everything is combined well, you don't want the wreath falling apart later.
Spray the bundt pan with nonstick cooking spray. Start spooning (*snort*) the mixture into the pan, as you spoon it in, press firmly to the bottom.
Keep adding the rest in layers making sure to press firmly and even it out as you do. Set it aside and leave it overnight so it will harden,
you will notice in the morning it has become really hard and looking kinda white.
Just turn the pan upside down and the wreath will slide right out....careful not to break it though.
All that's left is to tie a ribbon to it, or if you don't have a ribbon
Once the wreath is hard, gently remove it from the mold. Tie with ribbons, and hang it for birds to enjoy!!
Sunday, June 19, 2011
Mollie Makes
I am in love!
That's right....IN.LOVE. With a magazine, but not just any magazine, a delicious, gorgeous beauty all the way from England.
I'm not even going to attempt to describe my love for everything English, you know that already.....what I WILL say is that, that love is what prompts me to always be on the look out for books/movies/tv shows/magazines, whatever, from the UK. If something is new, I want to know and I want to see.
When I first heard of Mollie Makes I thought, well this is just another crafty magazine and to be perfectly honest I have not really liked any craft magazines on the market.
I've bought a few and have leafed through them and realized that it's about everything BUT crafts and homemade goodness and it's a turn off for me.
Mollie Makes launched in May of 2011 in the UK and was made available here in the US after June 9th, but let me tell you trying to hunt down one of these mags is no easy feat. You have to be fast. These babies sell super quick.
If you want a list of where they are available here in the USA, then check this link out. Over in the UK they are very close to releasing Issue #3. Yeah #3, but us folks in the US are only now getting #1 and I'm assuming #2 pretty soon. If you want to subscribe you can just go the subscription page.
But I'm getting ahead of myself, let me show you the goodness inside.
With every magazine, it seems that you get a little craft kit, the first issue brings this cute felt case for a smartphone.
Oh goodness, this picture above makes me smile in so many ways, I don't even know what I like the most but I would have to say those pillows are going to find their way into my home.
Ruffles, Ruffles, Ruffles. Ok truth be told, I'm not a ruffly kinda gal, actually ruffles bug me for some reason, but I think that is super cute, I may just have to revise my like of ruffles, we'll see.
Really? I mean REALLY? Cause that has got to be the cutest darn crochet project I have ever encountered in my life and yeah.....these will be in my kitchen by next weekend.
Garlands. I WUB garlands....yes I realize I said Wub, but really I wub them so much, just love love. Like super love garlands and these happy little garlands above are also going to be featured in my home...like really soon. I know I've said the words love/wub/like many times....but you know.
Holy cutness alert. Eggs, fabric eggs, with adorable embellishments......hold me.
There is so much goodness in this magazine, it's visually stunning, it leaves you salivating and oohhing and aahhing.
My kids will flip out when I make them these felt chihuahas.
And how about bobble trim? I mean I will admit I don't have any at home, I usually frown upon the bobble trim at the store cause I've never known what to do with it, but dog gone it, why didn't I ever think of this? And that is just one of the cute pictures and ideas for using bobble trim.
If this magazine wasn't super cool enough, it comes with two pages full of templates for the various projects within. Like I said, I.AM.IN.LOVE.
Now don't take my word for it, I know we don't all like the same things and chances are I may think it's the cat's meow and someone else might think it's not worth the $12 I paid for it....I think it is and I think I'm going to continue getting it every month and even more, I think I already convinced my husband to get me a subscription for my birthday in August. Oh yeah!!!
So if the pictures above don't convince you or you need to see a little more, check out this video, if this doesn't have you running out the door looking for your nearest Barnes and Noble or Joann Fabrics, I don't know what to tell you.
*sigh* that's all I can say.
I'm just going to go drool over my magazine and leaf through it for the 10th time or maybe it's the 11th I don't know, I've lost count.
If you want to take a peek inside the Issue Sampler, click here. Oh and if you want the templates from the magazine, you can get them at Issue #1 and Issue #2.
Now I'm really leaving...no really, I'm going.......
Wednesday, April 06, 2011
Want to do it all
Ever feel like there is still so much you want to do and try in your life and not really sure how to even start?
I've been feeling that way lately, there is so much I can do and honestly when you sit back and contemplate on the things you're good at, you'll be quite surprised at the plethora of talents you possess.
I don't know how to do that! I'm not really good at doing anything!
Those two phrases drive me insane and make me want yell out "YES you can, YES you can do it".
Then I have to remind myself that maybe I should practice what I preach? See I'm in a bit of a conundrum.
It's quite overwhelming at times, living in this brain of mine, because I have so much going all at once, so many ideas and projects and want to try's. So how do you break it all apart, how do you put it into practice?
That's what I'm thinking about the past few days.
I'm getting nowhere fast I can tell you that much. HA!
Maybe I should stop watching The Homestead Blessings DVD's because the West Ladies make it all look so easy, I find myself wanting to spend a day with them, Quilting or Sewing, Gardening or Candle making. Oh quilting, do you know how long I've wanted to get into this craft and how totally overwhelming and intimidating it is to me???
I guess I'm not very creative when it comes to picking fabrics and colors. Some people just have the gift, they can whip up something so beautiful and it makes you go "wow, I would have never thought to use those colors together". I want to be them.
But anyway, decisions decisions decisions. This girl is very confused and not quite sure what to do or where to go with it, I'm just praying for some guidance and maybe a little pull in the right direction.
Have you ever felt this way?
Can some of you quilt makers out there give me some advice on how or where to start? I can sew, very well actually, I learned from my grandmother who is a seamstress, so sewing is not my problem, it's the starting and the piecing and all that other stuff, that I have no idea how to do.
Thank you in advance, you have no idea how happy that will make me.
Alrighty then, I guess I will go back to my book which I'm totally enjoying. Just thought I would come by and let you know what is going on in my brain, maybe my bloggy friends can help me sort it all out.
Friday, January 29, 2010
Personalized CD/DVD Covers!
I always have a stack of DVD's and CD's on hand for when I want to backup photos or movies or music etc.
The one thing that I really don't like about it is that they don't bring any sort of box or cover, you always end up with a gazillion discs just laying around, waiting to be scratched and filled with fingerprints from sticky little hands. Blech!
At first I started buying the little white sleeves, but then I realized, you know, I want to personalize them, using different colors and lettering and pictures etc.....besides, it's cheaper to make them myself.
I'm sure most of you already know how to do this but in case you don't, here's a super simple tutorial to show you.
I now use these for birthdays and Christmas gifts too, even Valentine's day to hold a CD filled with mine and hubby's favorite songs, the ones that have special meaning or take us back to a certain place and time.
First thing you need to do is grab one of the old white sleeves and carefully pull it apart, so now you're left with the template.
I'm going to use the polka dot paper. You can use whatever paper you have on hand, but I like using Scrapbooking paper which is a little sturdier.
Turn your paper around with the front facing down. Lay the template on the back and trace with a pencil. Cut out the template.
Then using a little bit of glue, fold the paper following the template.
At this point you can go ahead and either keep it really simple and just add the title, or you can go all out and add printed pictures or lace or buttons or whatever. For these I kept them super simple.
They're are so much fun to make and really fast too, I'm going to continue making mine and once I have them all done I'll post another picture.
Go on now, go have some fun, get the kids involved too, I've actually made two plain white sleeves that my kiddos are drawing pictures on after school, how fun will that be?
Subscribe to:
Posts (Atom)