
Hey everyone :)
Today's post is going to be a short, quick tutorial for a fun and pretty inexpensive DIY, that is just perfect for Fall.
I don't know about you all, but I always have pine cones on hand. We have 3 acres of land, and a lot of different trees, shrubs, plants and flowers. One of the biggest trees in our back yard, is a gorgeous pine.
The ground below it is constantly littered with pine cones of all shapes and sizes, so when I want some for decoration, I just step out back and help myself to the bounty available.
When I didn't have a pine tree, I still had a ton of pine cones because as soon as Fall came around, one of the first things I bought were the $3 bag of cinnamon scented pine cones at Walmart.
So as you can imagine, I have quite a collection.
This year, I have decided to try and make a lot of my decorations, not just for Fall but Thanksgiving and Christmas.
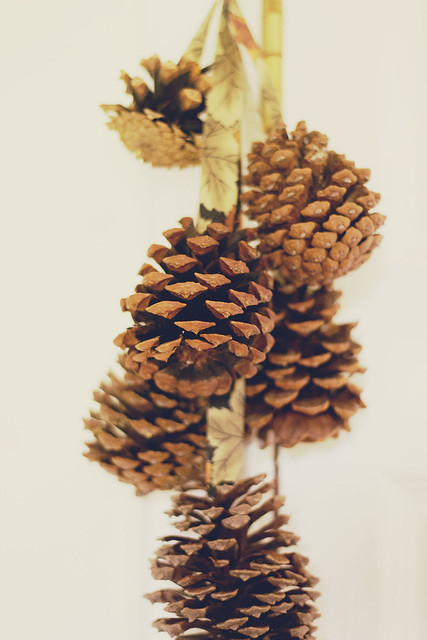
The Pine Cone Swag is a super easy way to use what you already have on hand and make the cutest little swag that you can hang from your front door, or anywhere inside your house.
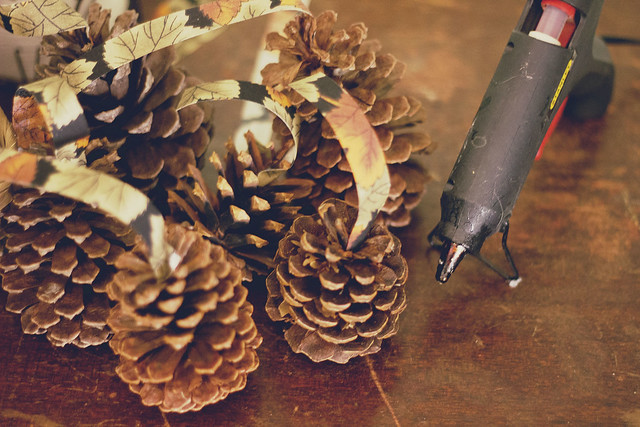
All you need are some pine cones. I used 6 for each swag, but you can add more or less, it really just depends.
You also need some fabric or ribbon that coordinates with the season you're making these for. I actually had some ribbon that is very Fall like. I didn't have a lot of it, so ended up actually cutting it in half to have enough for two swags, which means I also ended up with the ribbon strips thinner than they originally were.
But, never mind that, it works.
Last, you'll need a hot glue gun.
What you're going to do is cut strips of fabric at different lengths, some longer, some shorter and so on. Then all you do is hot glue the fabric or ribbon to each individual cone. Then hot glue them all together at the top.
I used another piece of fabric to make a loop at the very top so that I could hang the swags.
And that is it. That's all you need to do.
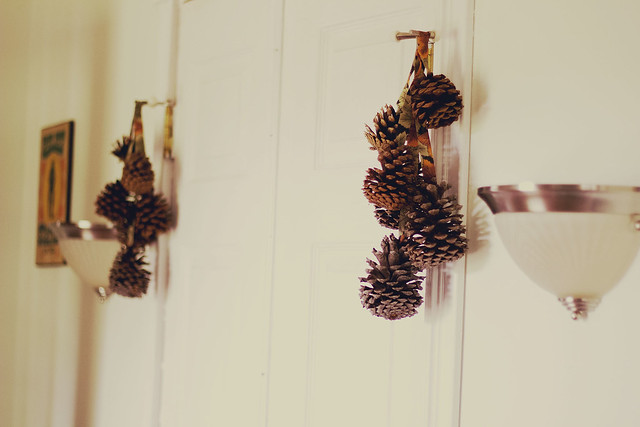
I plan on making some more of these to hang in both living rooms. At the moment they are hanging by my entry way so they're the first thing you see when you walk into the house.
I will also make some for Christmas, using coordinating fabric for the season, but I'll show you those once I have them done.
These were the quickest DIY I've done to date, and it was quite fun making them.
Hope this gives you all some ideas and inspiration for your own homes :)

2 comments:
What a wonderful tutorial......I love how they turned out......love using natural things.....
Thank you for sharing
Blessings
Rhonda
That's such a cute idea. X
Post a Comment